 We decided to tackle our outside space as it needed an update and some sprucing up.
As well as the garden, some of our decking boards had rotted and were spongy. Those boards taking the most footfall needed replacing before they gave way underneath someone.
Over the years, our outdoor space has been well used by my family and it’s taken a battering – what with teenage boys, their friends, and us.
How we transformed this space.
One year, we had bees nesting underneath the decking. We’d often have to jump out of the way to watch as the bees, one after another, came into land like Lear jets, disappearing through the gaps in the decking. This went on for a month or two and totally freaked one of my sons out, who’s not keen on anything buzzy. This made for some great comedy moments.

 I’d like to share with you how we refreshed some of the decking. We didn’t want the expense of having to replace all of it so we decided to give it a go replacing the few rotted boards, ourselves. I’ll detail how we did it, below.
 Where it all began.
But, first, I’m sharing with you how this outdoor space came about, as it hasn’t always been an integral part of our home. This may be of use if you are looking to add or update an outdoor space, yourself.
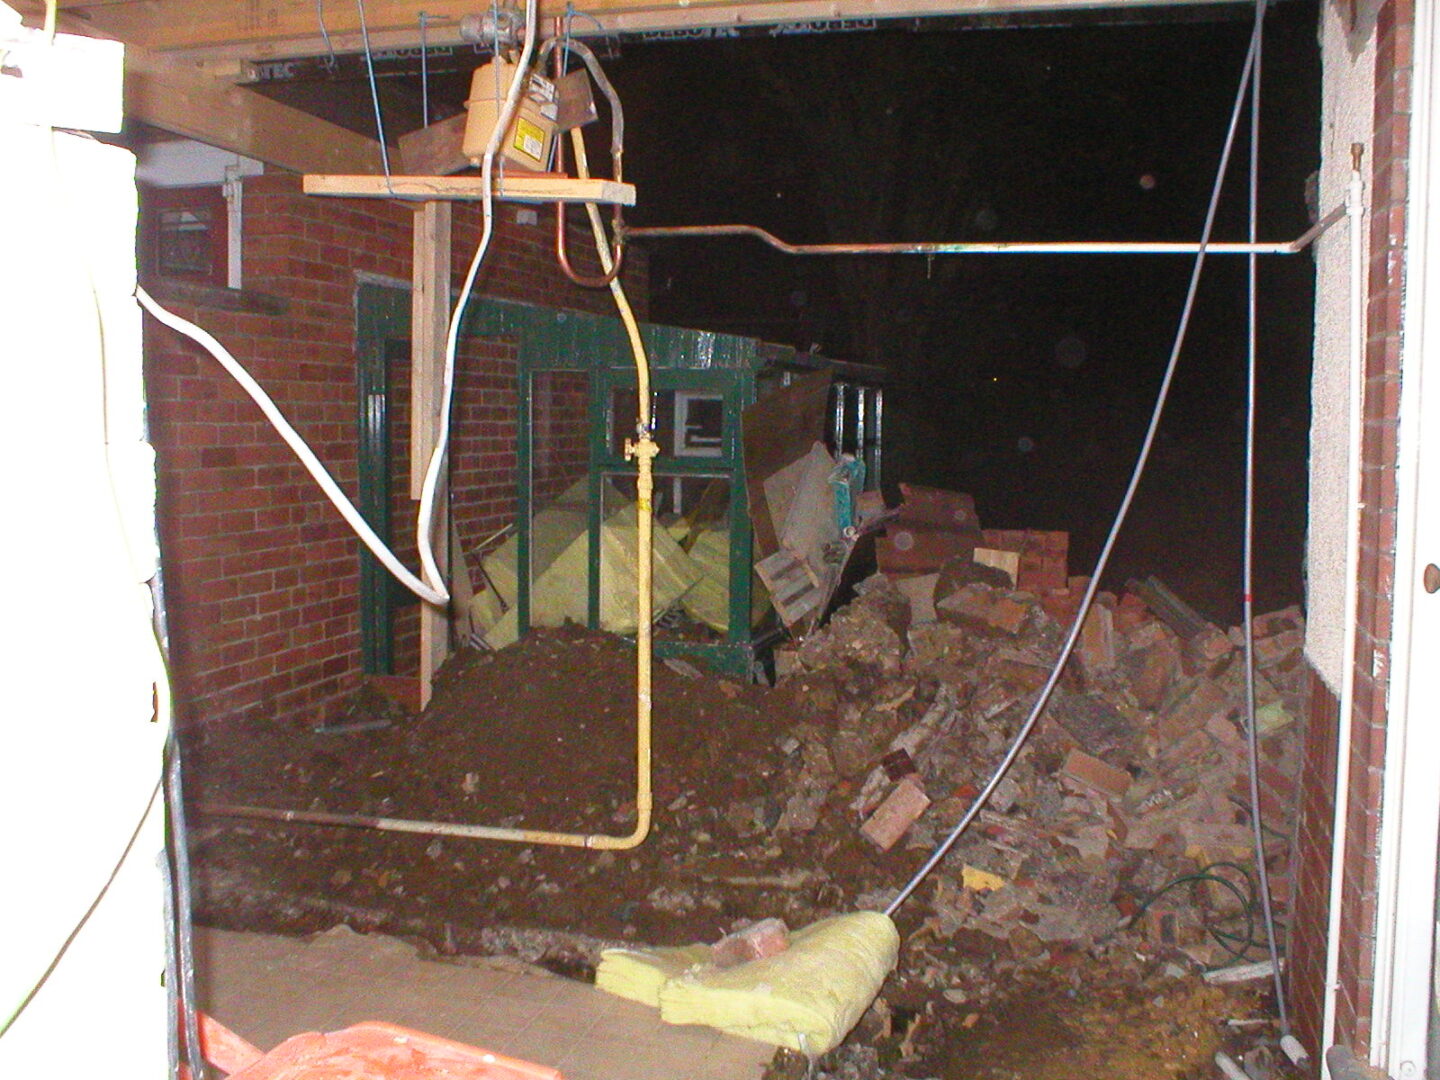
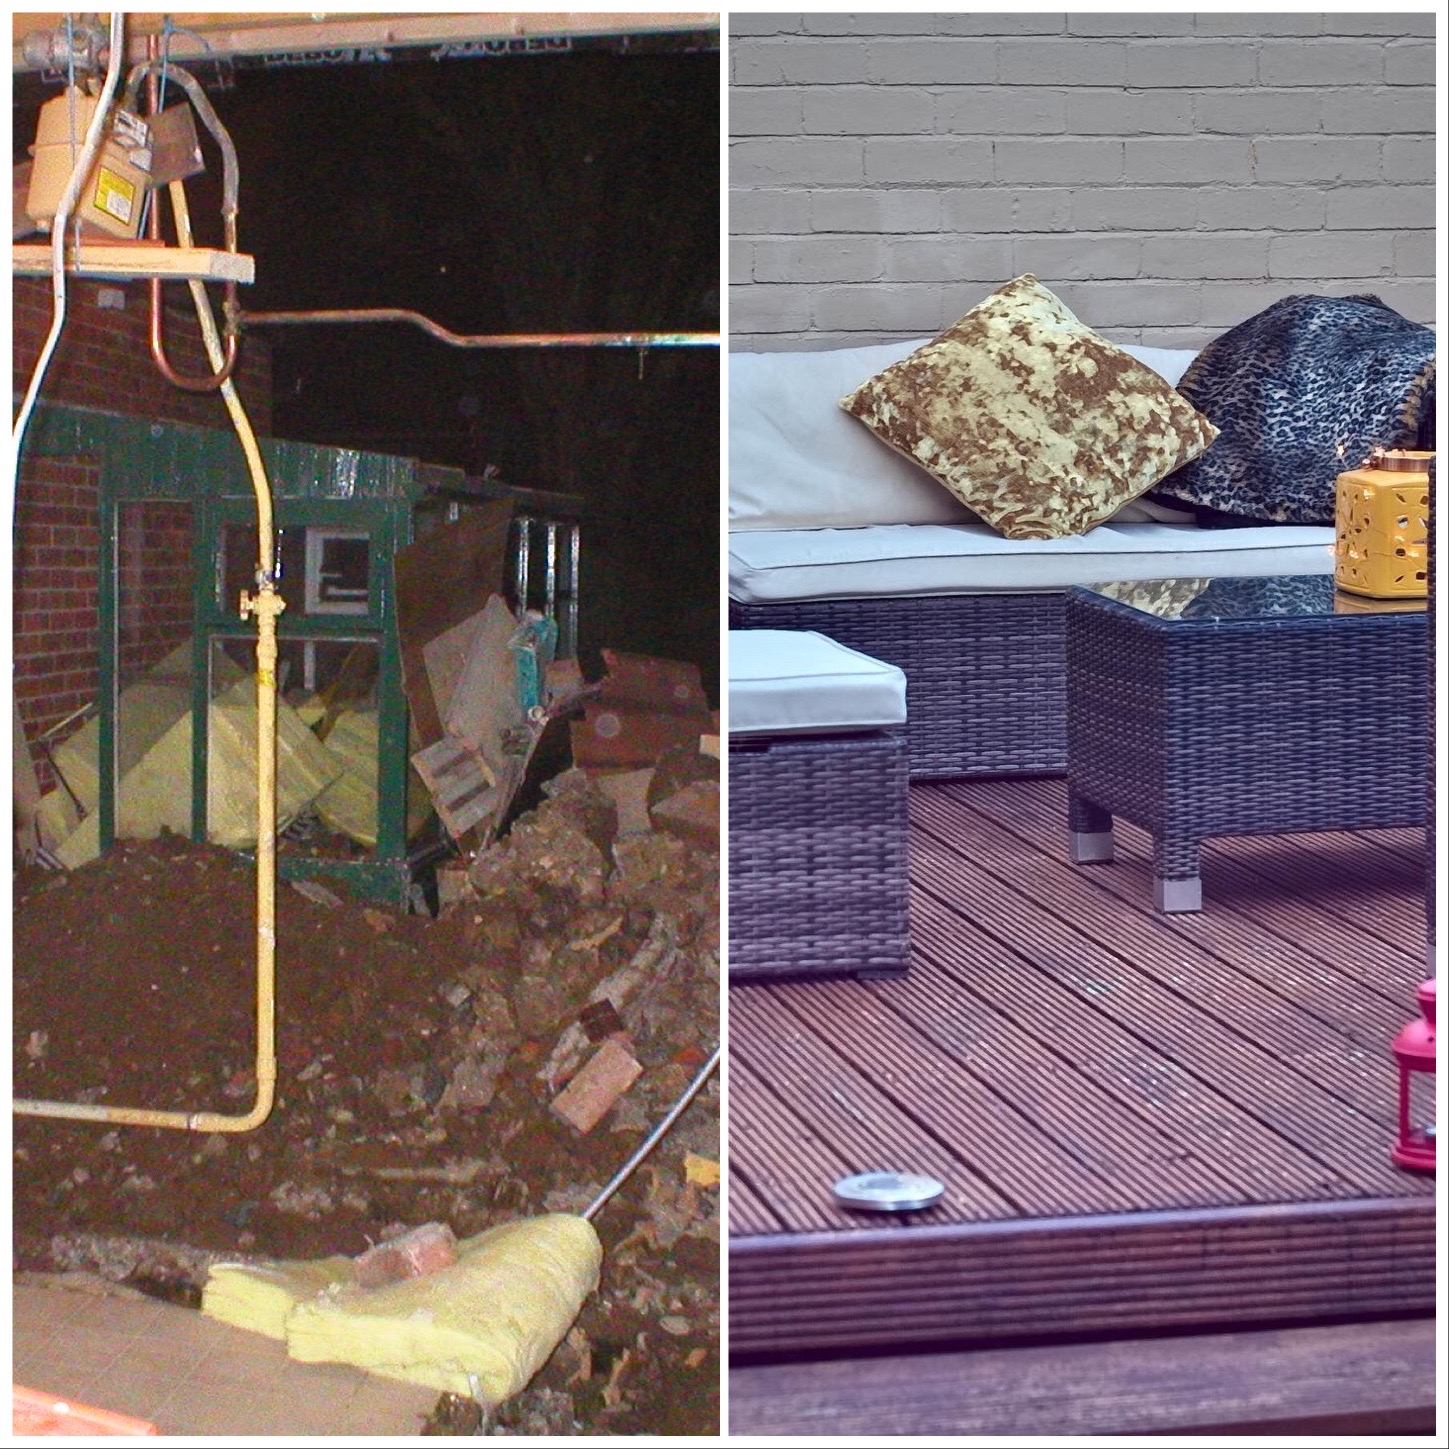
This was what the outdoor space looked like when the extension was nearing completion. The green frame was a greenhouse we inherited. The yellow thing hanging was the gas metre!
In 2007, we had a kitchen extension built. Despite exceeding our budget, overrunning the completion date, enduring constant mess, and a spate of shingles thrown in for good measure, we had at last, reached the end stage of the project.

We were unsure of what to do with the area leading into the garden from the new kitchen patio doors. The drop-off from the doors to the ground was quite deep. There had been steps there, previously, but they’d gone the journey to allow our new kitchen to be built.
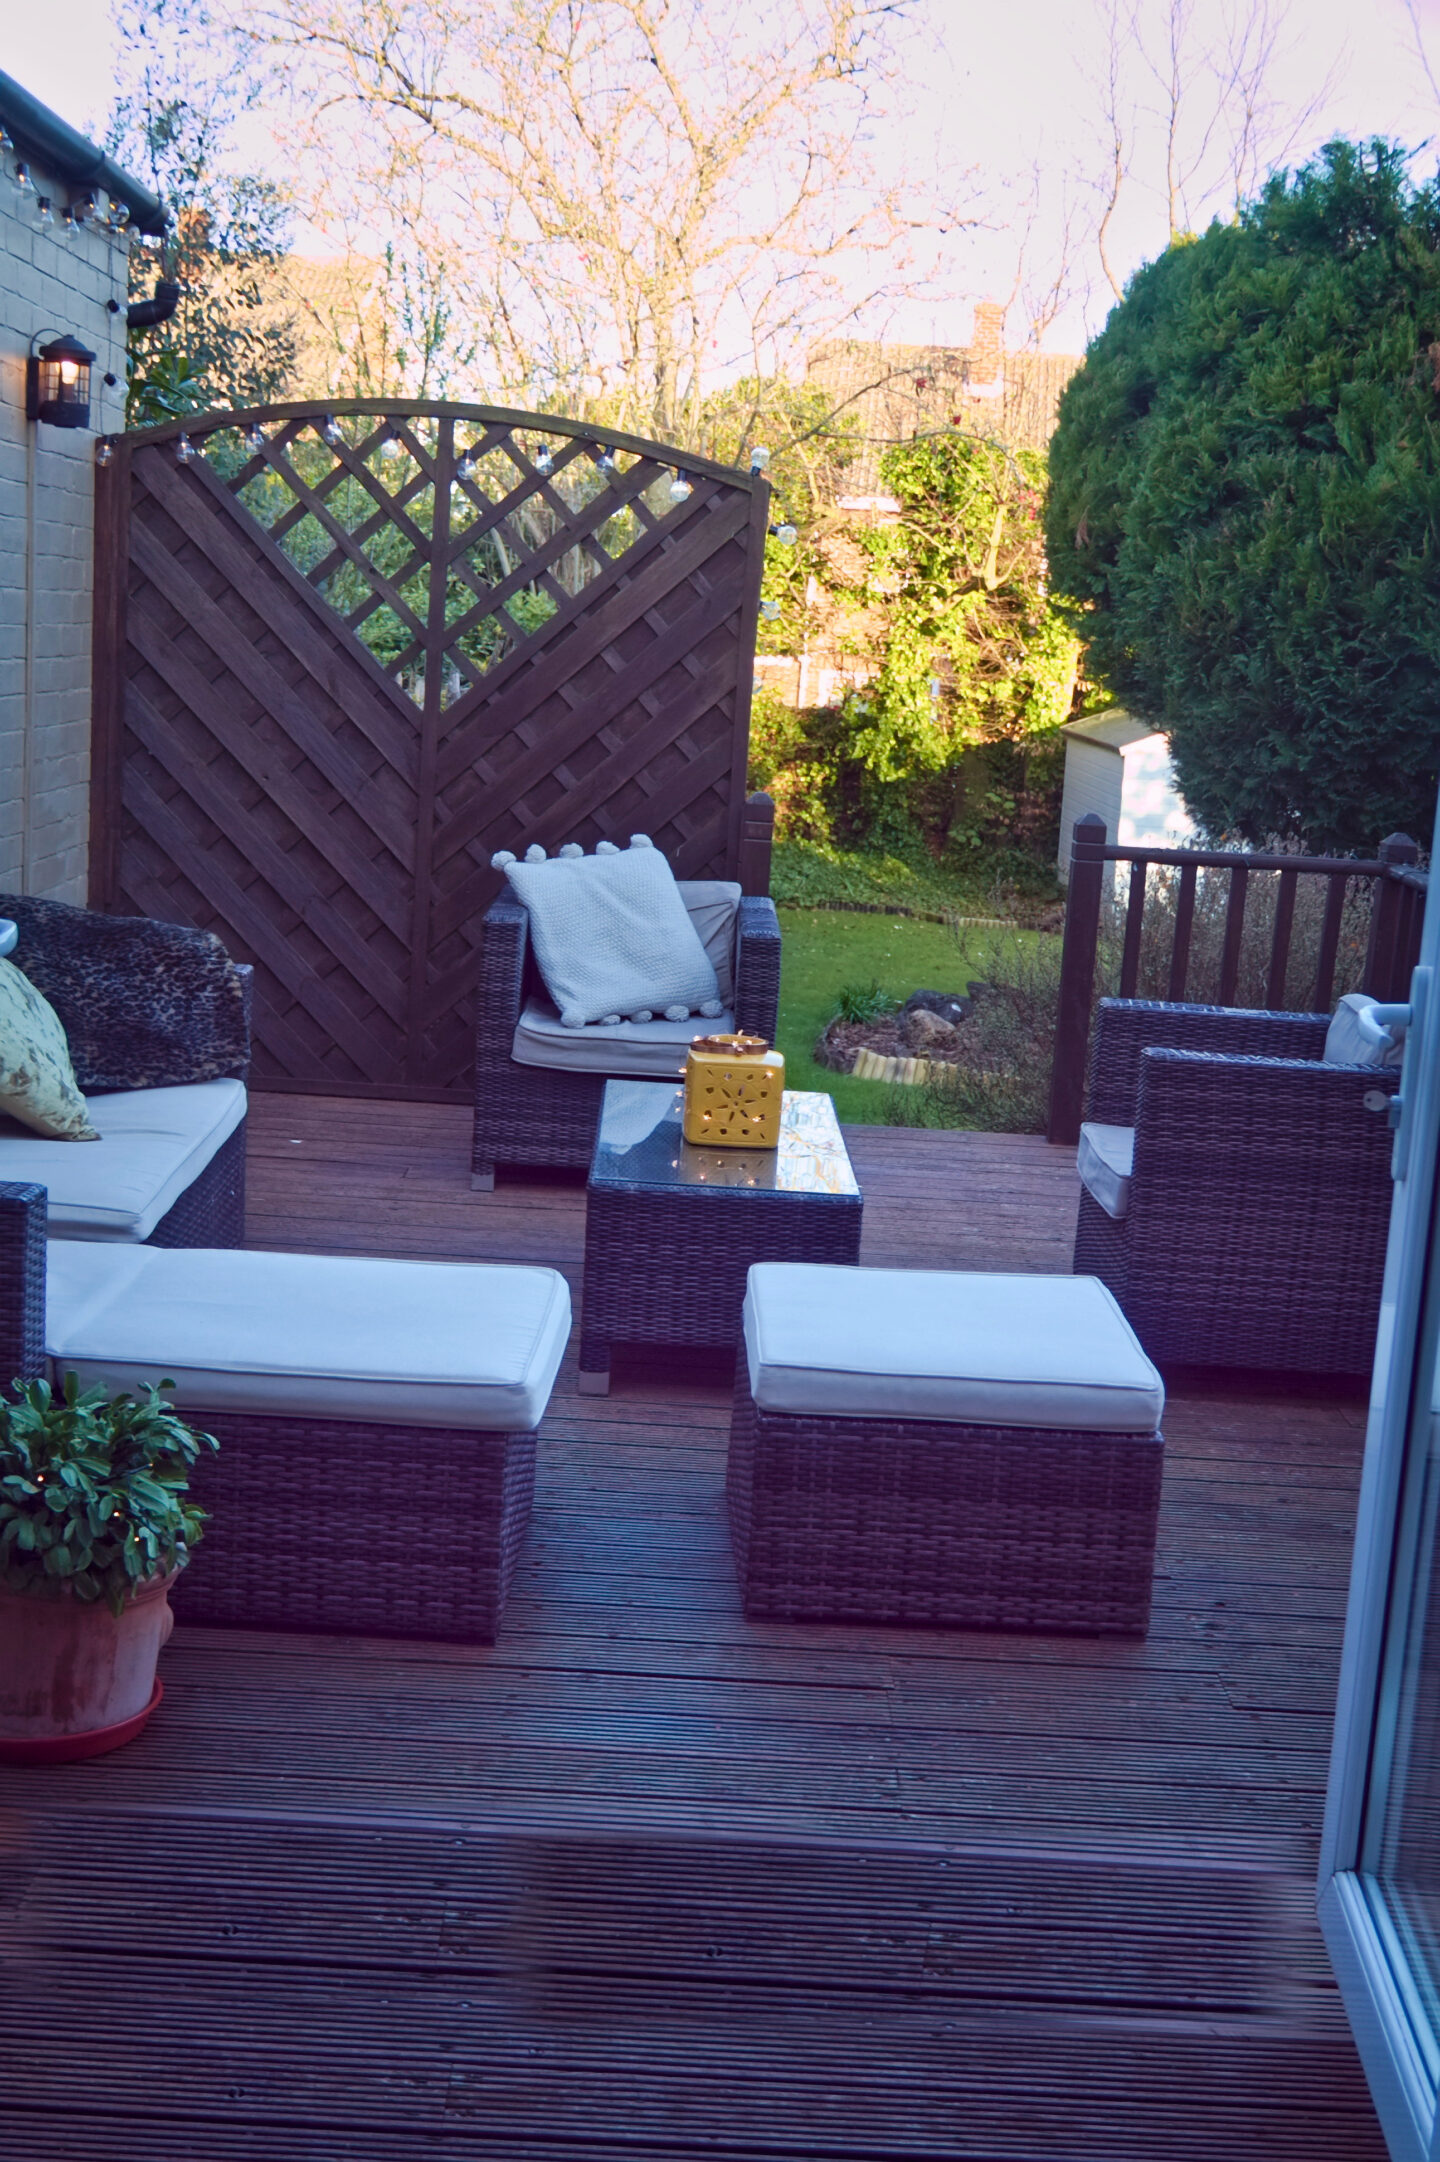
 The plan was to have an outdoor living space immediately accessible from the patio doors (above). We wanted a place where the family could relax or entertain when the sun was shining as well as on the rare occasions when it was warm enough to sit underneath the stars.
We tried our best to be creative and come up with suggestions, but we couldn’t see the wood for the trees. It wasn’t until we got all the mess/debris cleared that we could plan the way forward. As you can see in the photograph, clearing up was a big job.
 Following this, we gave ourselves time to reflect, coming up with a few ideas, here and there. Ideas discussed included an orangery; a conservatory; and even an ornamental patio. But, with our budget rapidly shrinking due to the kitchen and unforeseen, resulting expenditure, we finally settled on laying down a decking area. Thank goodness, we made a good decision. The outside space has given us so much pleasure. I love to sit outside with a cup of coffee – even on a cold sunny day. For me, it was a perfect choice!!
Updating the Decking Boards
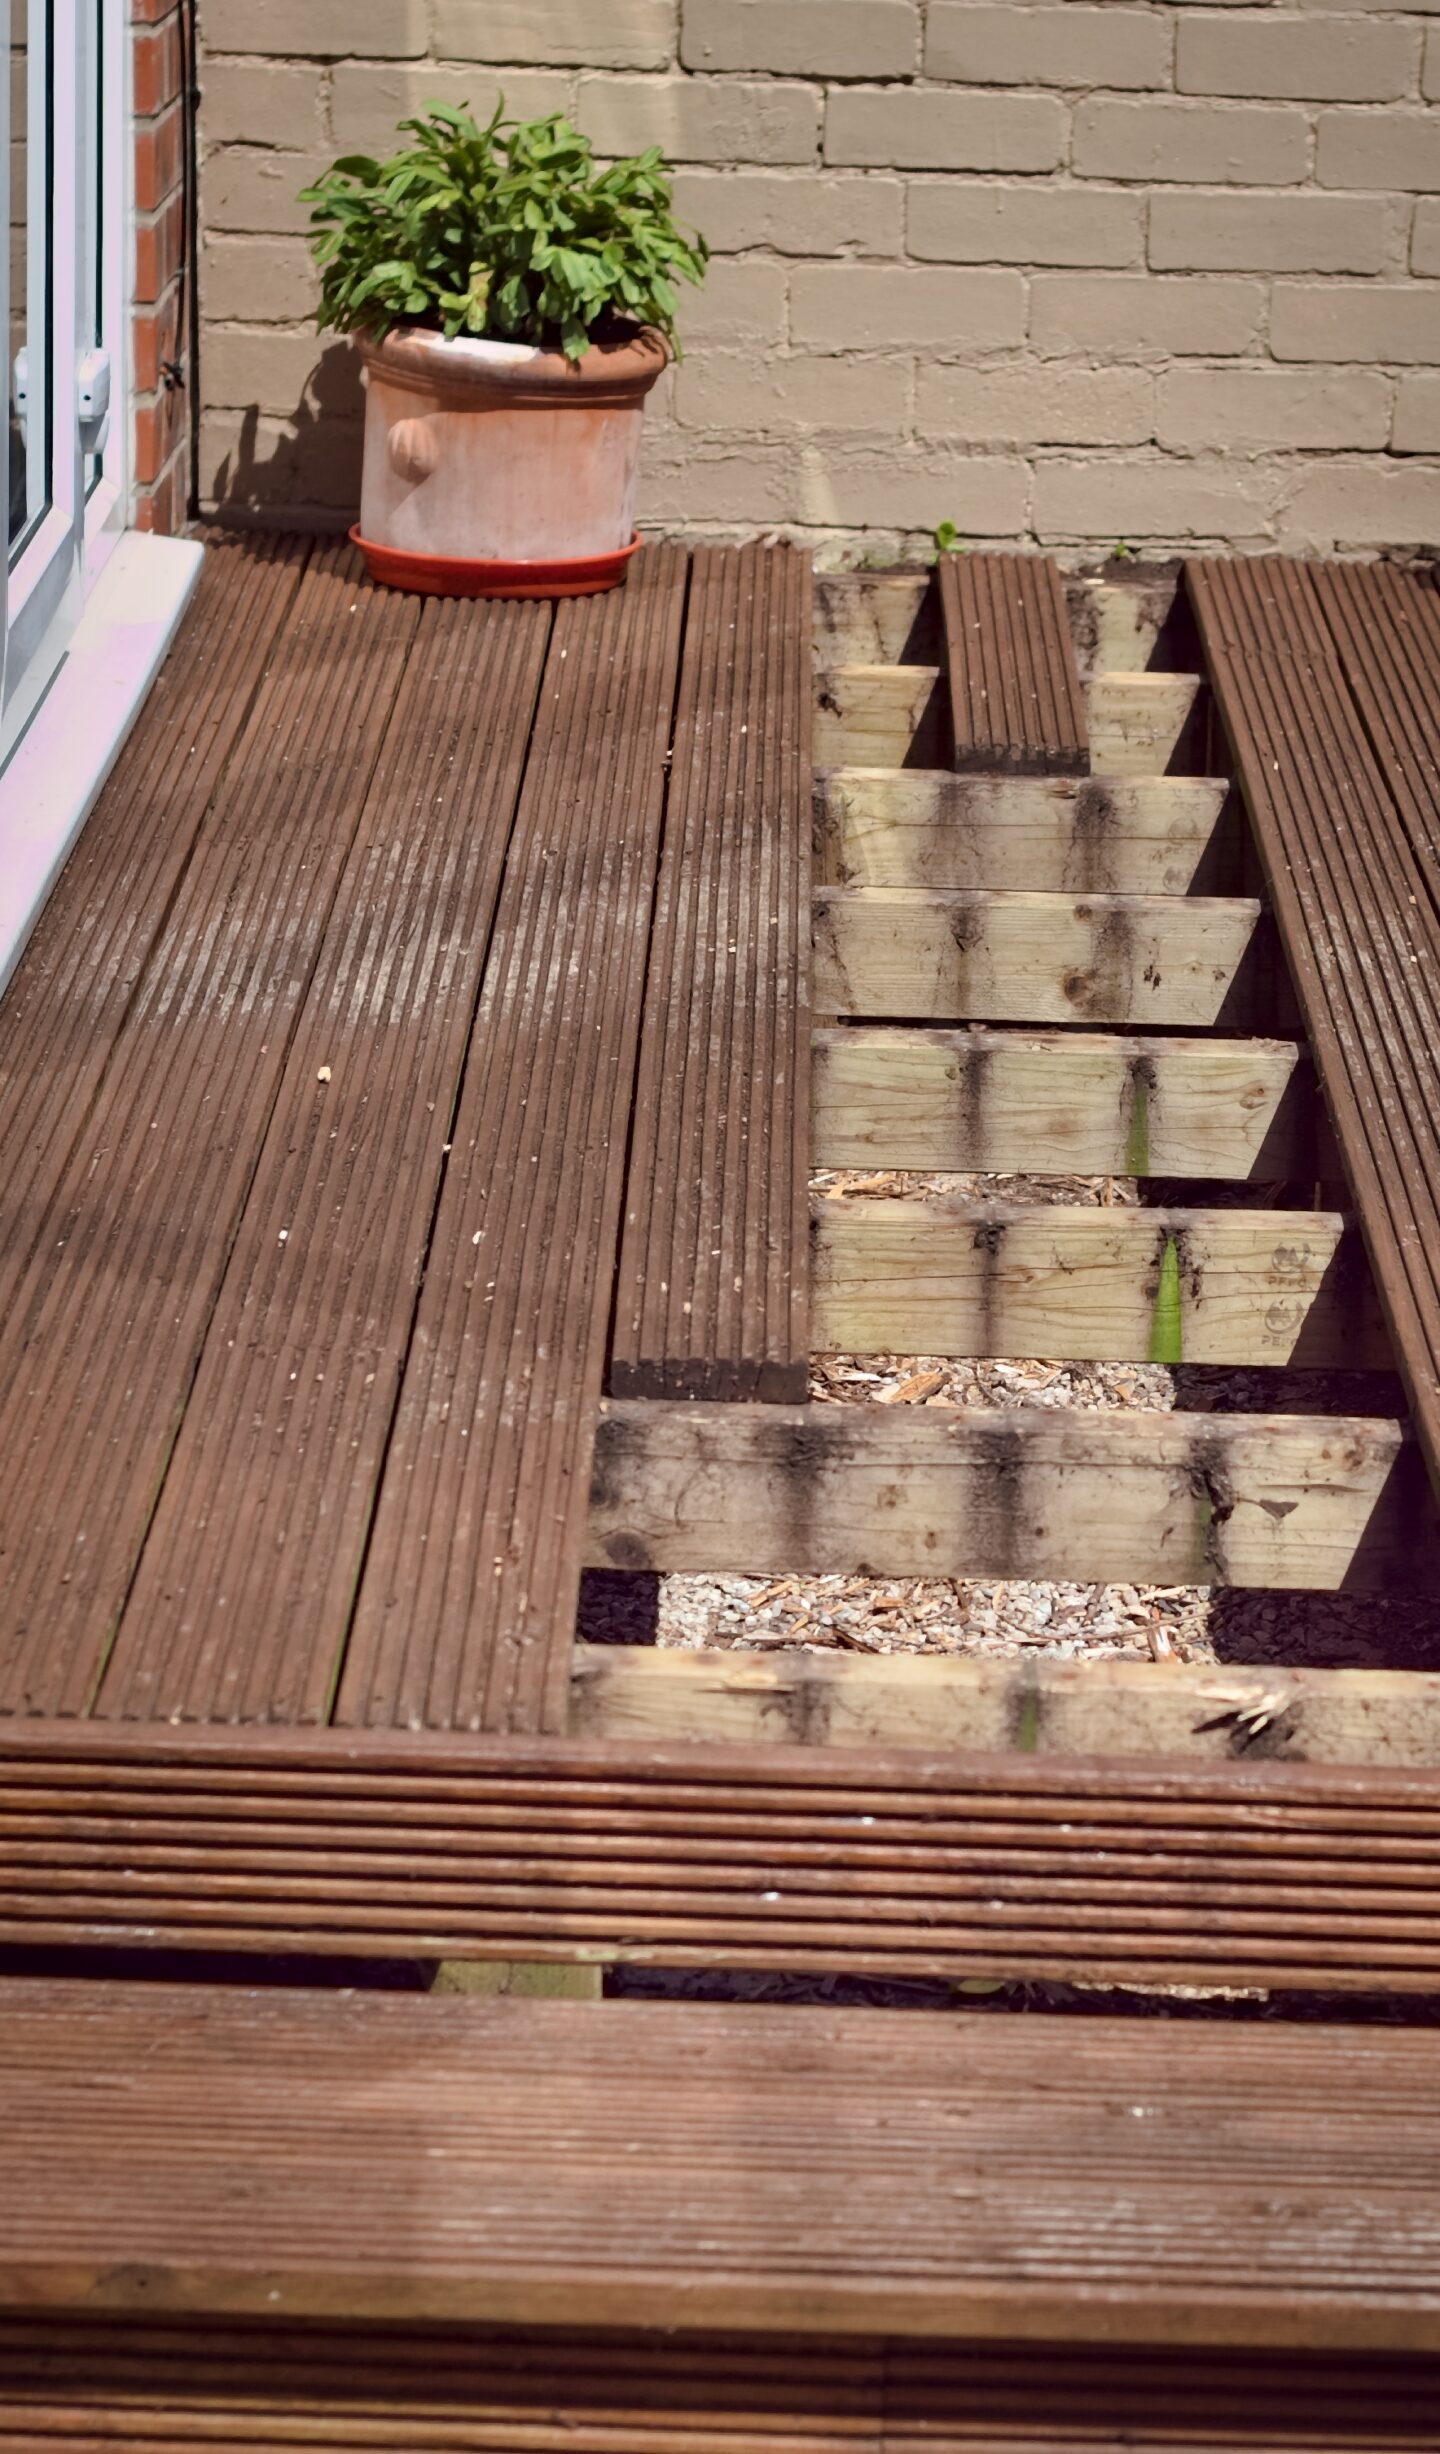
Since then, the decking boards have been cleaned, stained, and treated numerous times. All in all, they have lasted well. I’ll explain how we replaced the spongy, rotted ones.
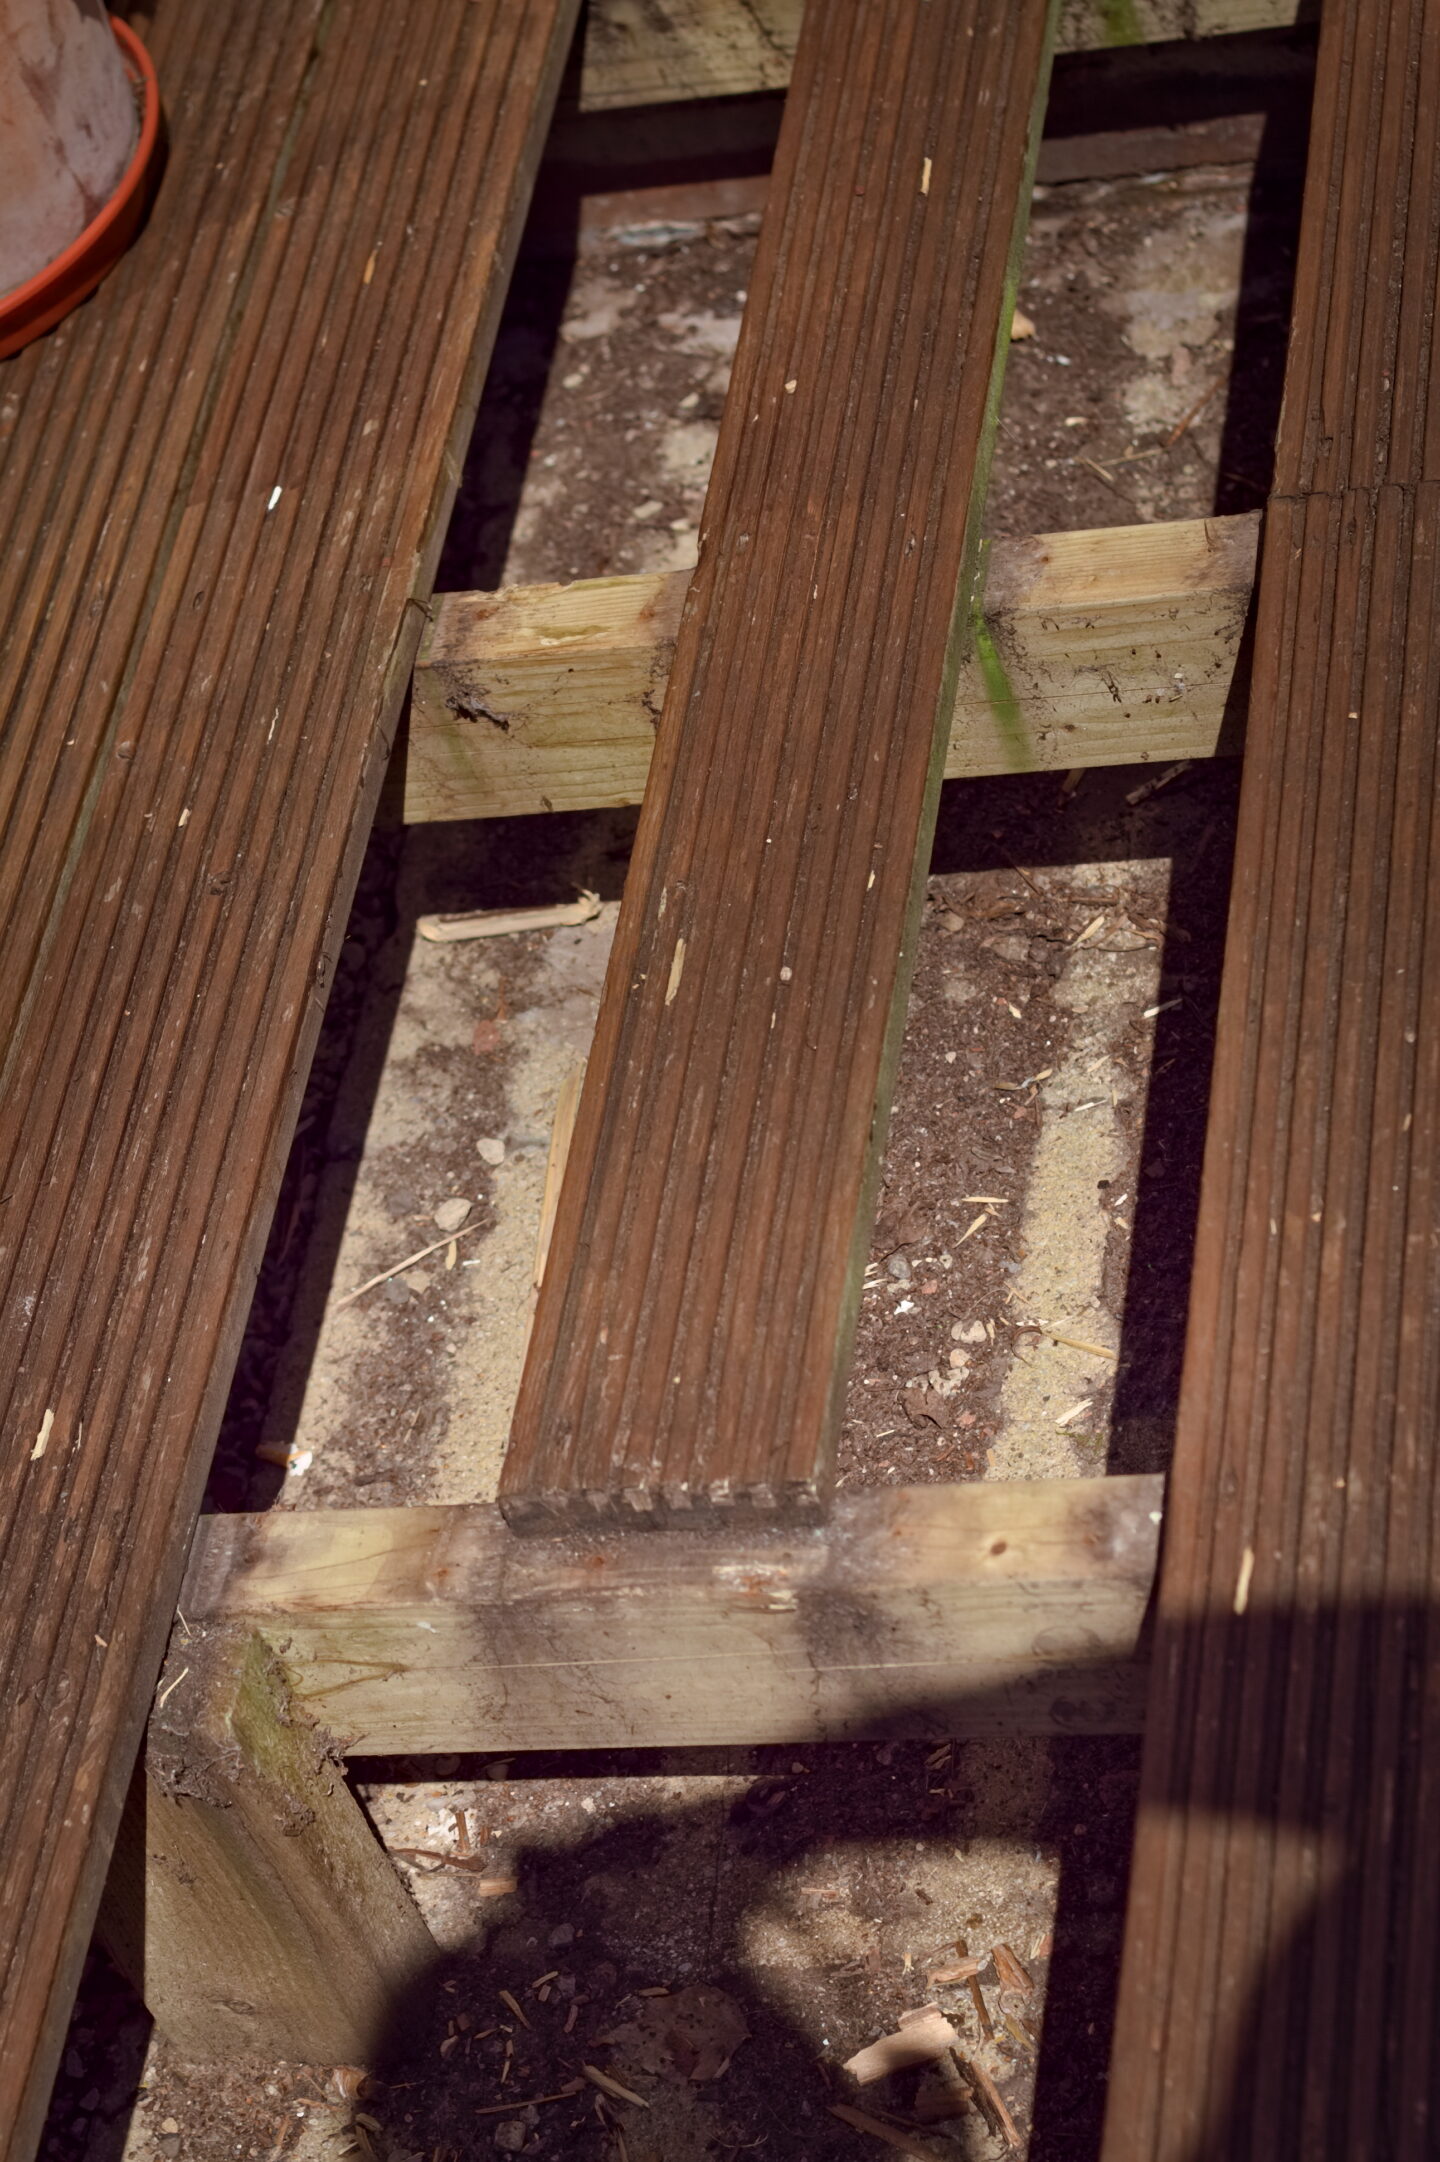 First of all, my other half, attacked the boards with a heavy hammer. It turned out this was not going to be a straightforward job. The hardest part was chopping out the wood, then the nails which were holding the decking onto the joists. My understanding is that, if screws had been used (when the decking was originally laid), they may have been easier to remove. I have to admit, extracting the nails being his hard work – I supplied the occasional coffee and beer.
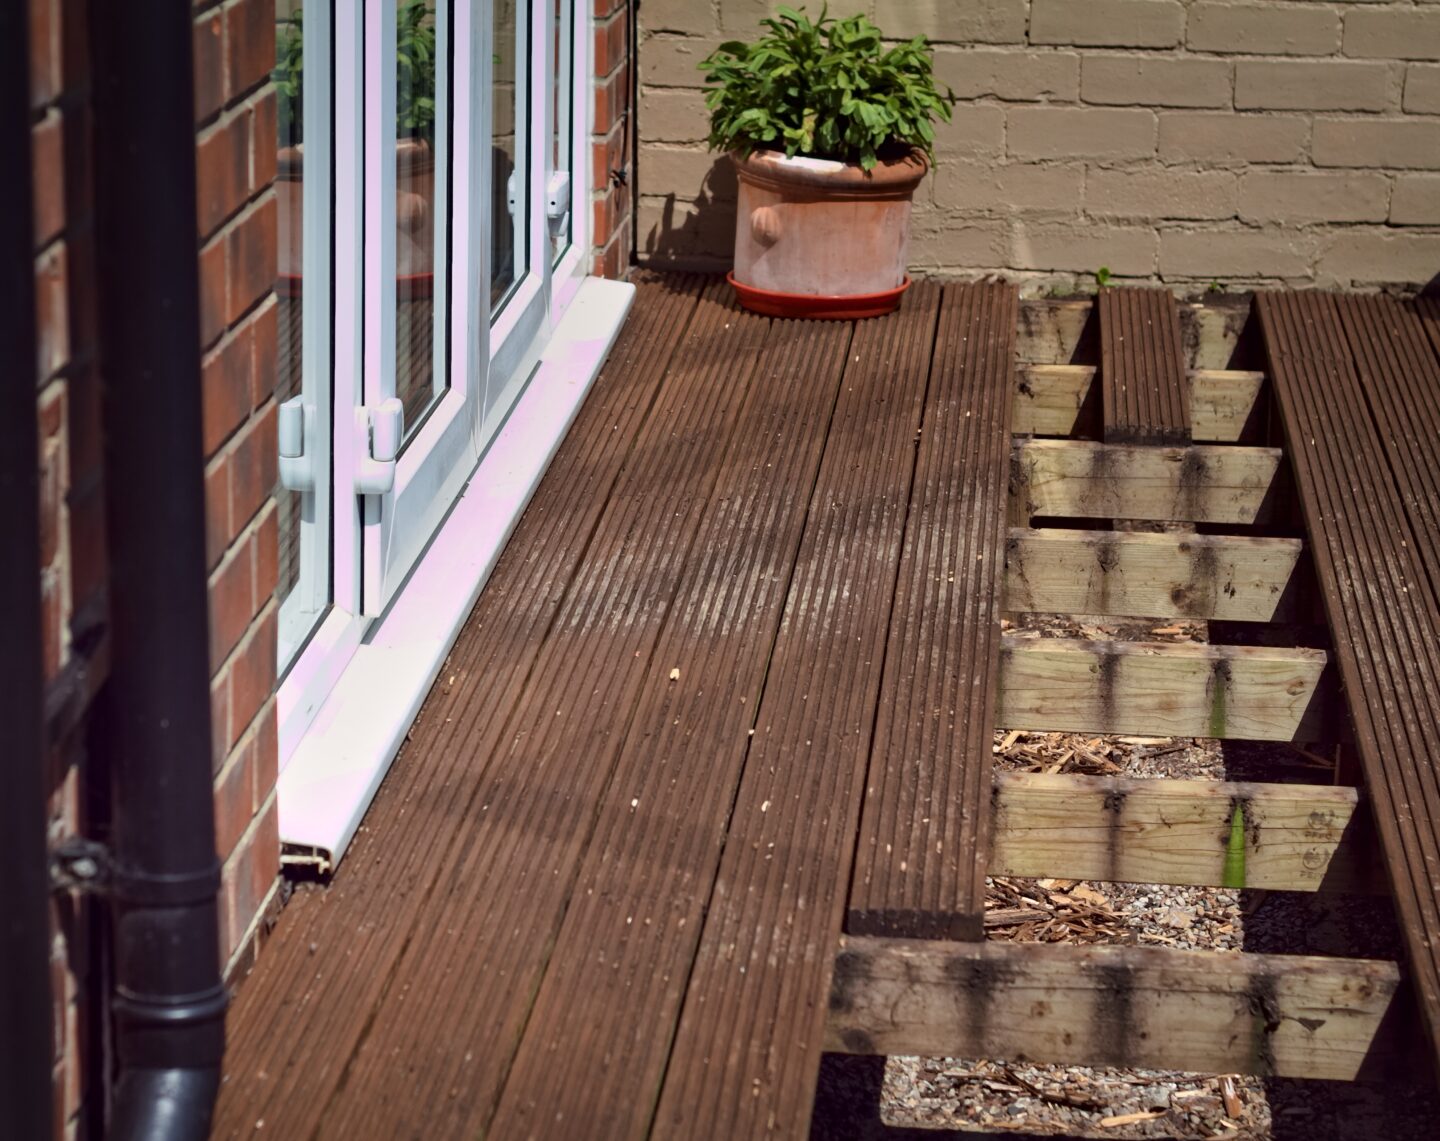 The new decking boards were bought from the local timber merchants for a great price. They were then inserted into the gaps, again, nailing each one into place. Following all of this, we jet-washed the whole decking area and gave it a good scrub – lifting dirt and weeding the adjacent paved area as we went along.
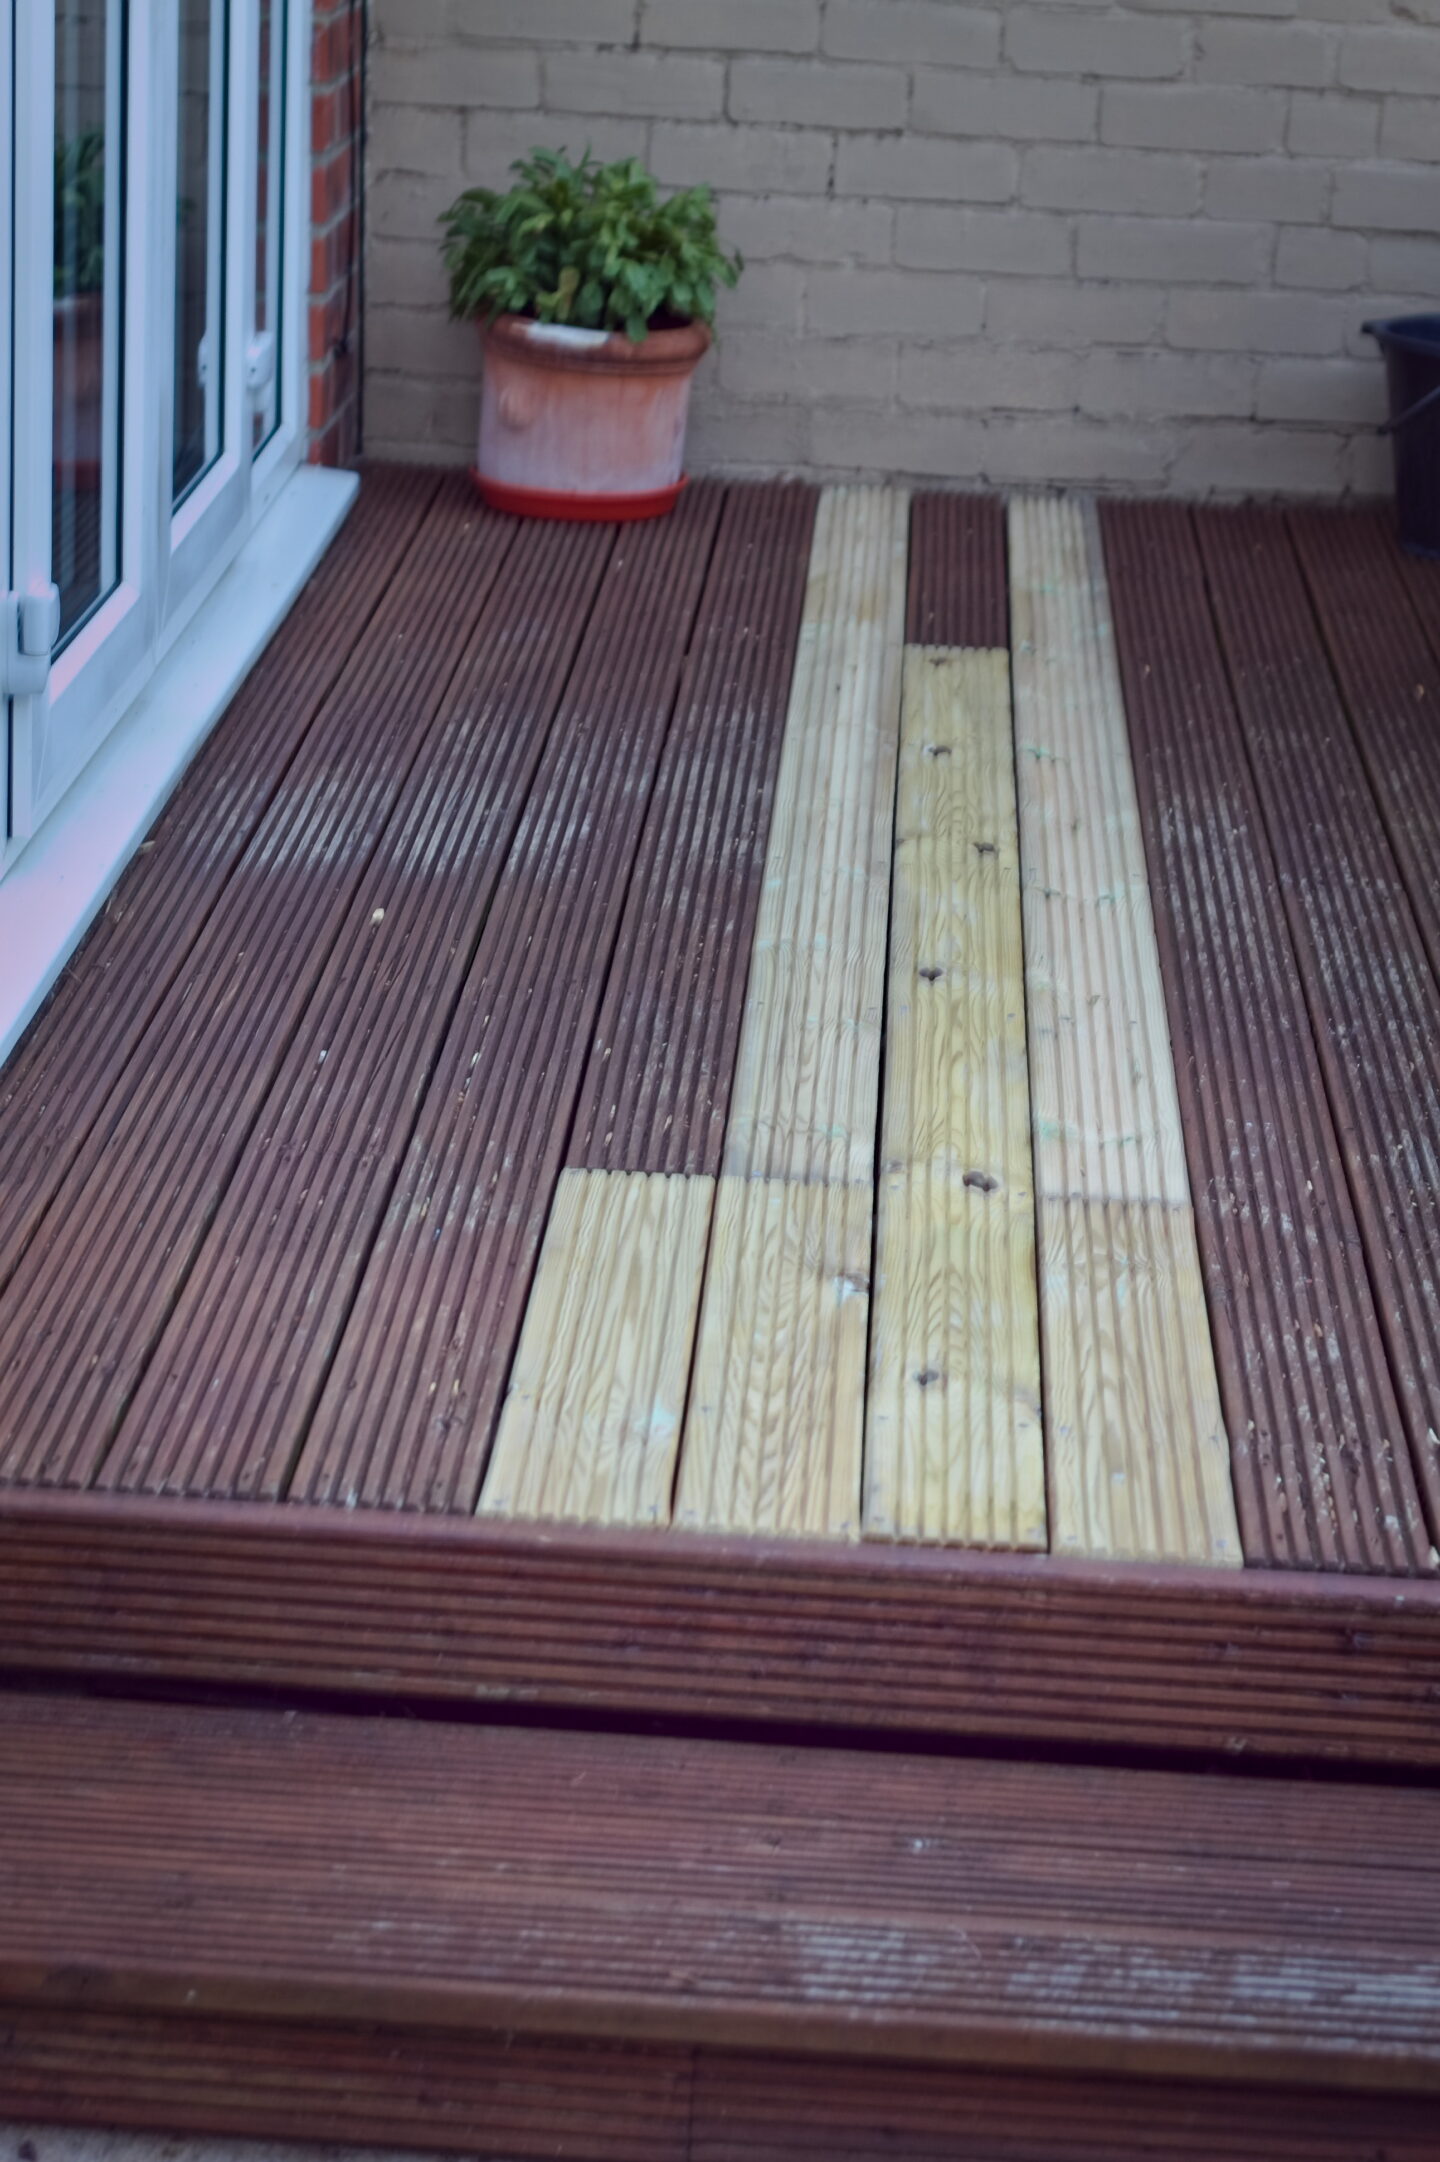 When it was completely dry, we then stained the whole decking area with the aim of matching the new with the old. It’s not a perfect match but I think it looks great and it has saved us so much expense. It is hard work doing it yourself but we’re delighted with the result and the cost-saving.
 Updating Walls with a Fresh Lick of Paint
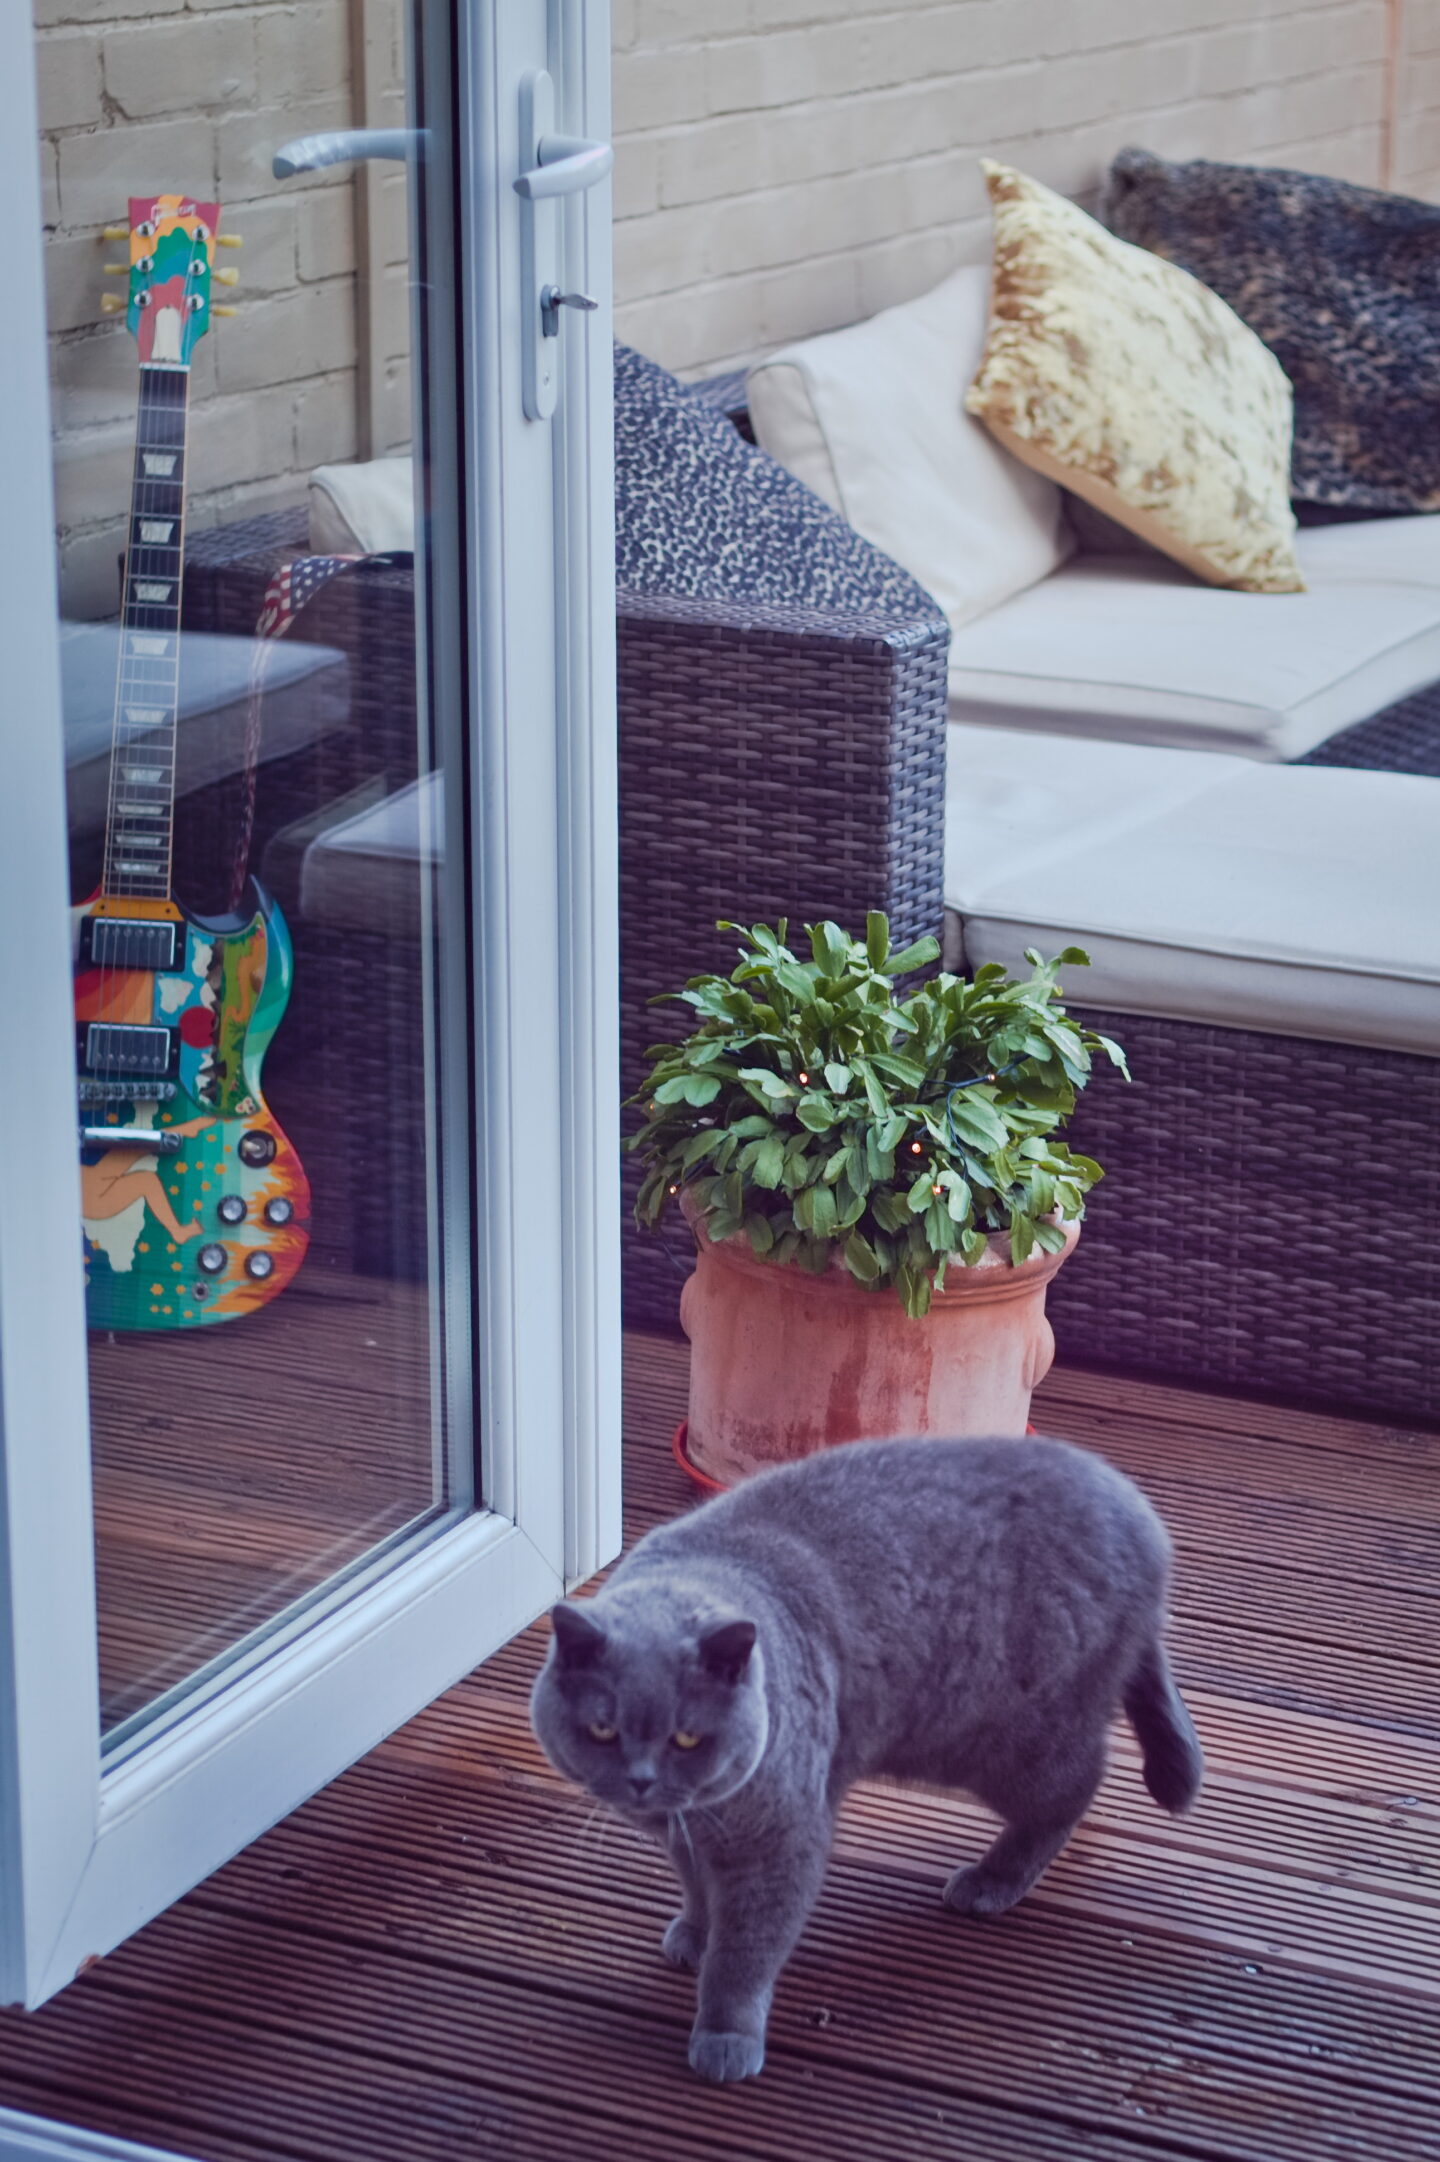
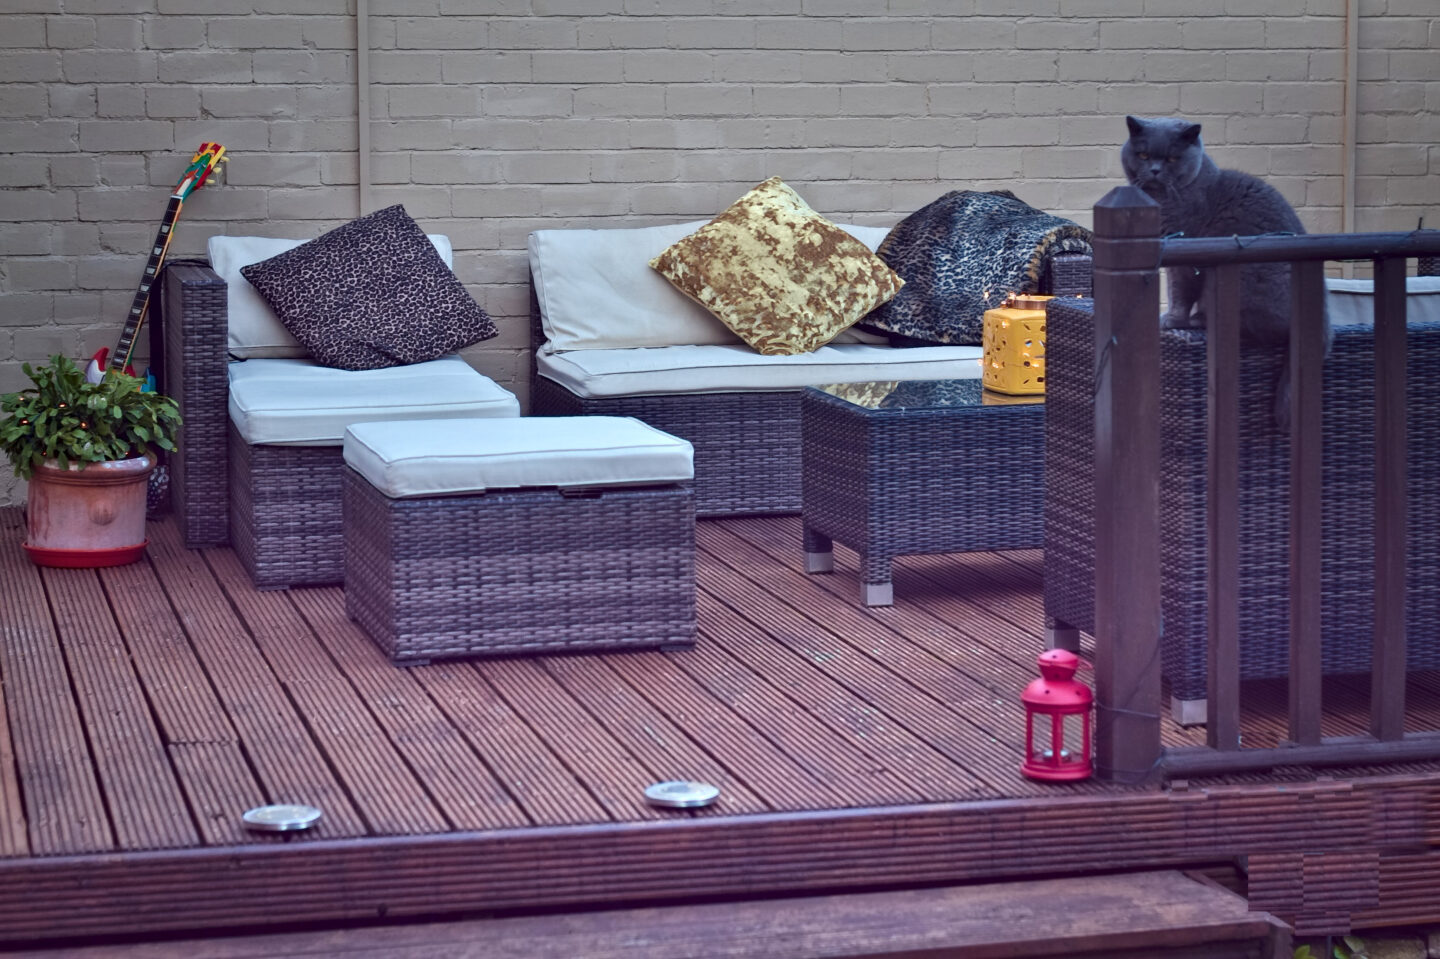
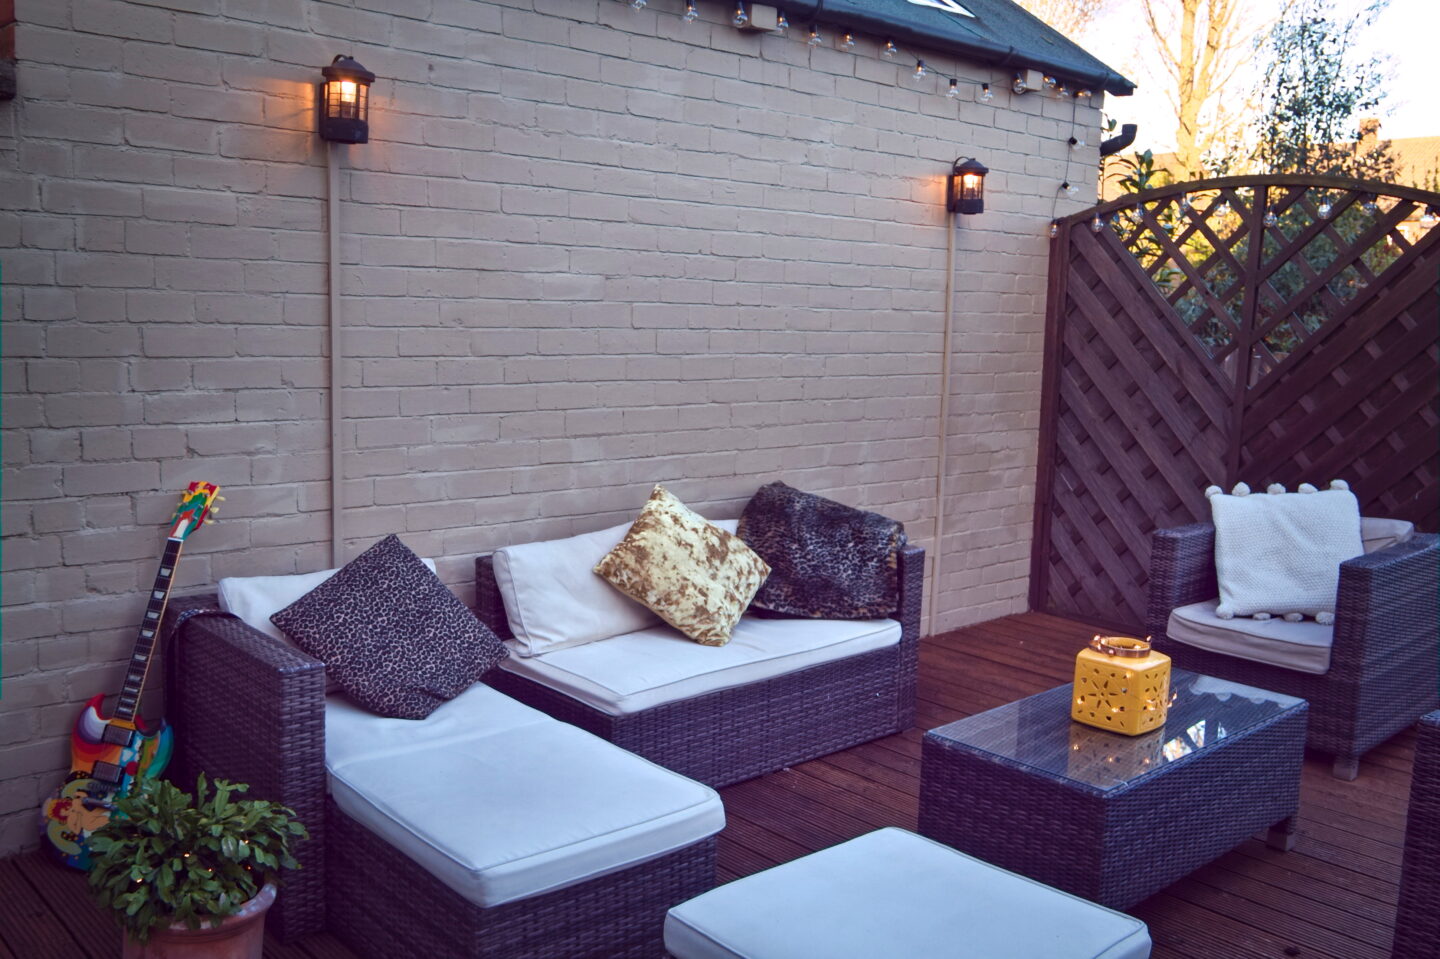
We paint this wall most years as it’s usually shabby following the winter months. Giving it a fresh lick of masonry paint brightens it up. Next, we brought out the garden furniture, washing down the cushions and, adding soft throws and textiles. Plus, now that Garden Centres have re-opened, we’ve managed to fill some pots with fresh plants that are beginning to flower as the summer season takes hold.
Electricity
I finished off the spruced-up look by adding Festoon lighting along the wall – these were bought from Amazon – and draping some solar lights around the decking rail, which light up every evening. They switch on around dusk. I want to add to our lighting as there’s some great creative lighting ideas for outdoors (see below). We had some outdoor sockets added when the decking was built so you may want to consider this for anything you plan, if starting from scratch.

I think it’s possible to revamp any outdoor space, no matter what it is you have. It just takes a little bit of thought, planning, and creativity, as well as adding your own style and personality – plus, a little hard work!! The result can not only improve the look of your outdoor space but give you such a great sense of achievement and bring so much pleasure.
Thank you for reading my post. I hope you have enjoyed it and found it helpful. If you have any questions, please let me know in the comments below.

Hope you found this useful. I have picked out some items from my post (below) which you may find useful:


We are in the process of updating our outdoors too. I just made a firepit which I will be sharing on the blog on Friday and we plan to build a pergola over the cement pad we have. Hopefully we can schedule that in the next month or so. Also looking for some seating for around the fire.
http://www.chezmireillefashiontravelmom.com
Author
The firepit will be lovely for the summer months, I love sitting outside, hopefully the weather will improve so it’s possible .xx
I feel like we are always working on freshening up some space somewhere outside. We have have a huge patio and deck and there is always something that needs attention. This space looks great.
Author
You’re right there’s always work to be done, either outside or inside the house. Lovely when it’s finished though. x
Wow, that looks like a pretty intense process, but the end result is fabulous. I bet you really enjoy spending time on your outdoor space. We are in the process of deciding how to spruce up our back yard! We are debating between a raised deck or a flat patio. Thanks for sharing and linking up!
Shelbee
http://www.shelbeeontheedge.com
Author
It was such a big job, but worth it when It was all finished. Hope you enjoy the end result. I love sitting outside when its warm weather. Have a lovely weekend.xx
It looks great Alison. I like the idea of the painted wall. It could be any colour that takes your fancy each year and accessorise around that wall. I’ve just decked my whole garden (it’s only small) It’s so low maintenance in my book. I hoover it with the Henry! xx
It looks great! Thanks for sharing at TFT!
I loved this post – your outdoor area looks so cosy and stylish! We are about to start work outside too. First I am getting rid of a tree and having a couple of others professionally lopped. Then I will get the garage repainted and new decking – ours is also creaky and gets very slippery in winter. Thanks for sharing this at #WowOnWednesday, I tweeted it on Twitter too.
Looks so good, well done and thanks for sharing this post. Jacqui x
Love the lights you chose! Beautiful job!
It sounds like a lot of work but all that effort is sure worth it – it turned out so beautifully. We are working on re-staining some chairs and wine barrels so hopefully that’ll make our backyard feel more homely. It’s been beaten badly from the sun and with the heat, it’s so hard to want to stay outside. Thanks to the lockdown, we don’t have a choice! But at least it’s a project and progress!
Maureen | http://www.littlemisscasual.com
That looks so good! I love refreshing the outdoor space. We have a deck that needs to be redone, but I am making other improvments . I do love sitting outside and your space looks so inviting.
jess xx
enjoy the day
http://www.elegantlydressedandstylish.com
Hey! your outdoor living space looks good, stylish and cozy haven. I’m jealous and I think i’m about to start to work our outside too. How much did you spend for all of them?
Author
Your timing is perfect as we were just talking about checking the outside decking following the winter
months. There is always the odd board which has become “spongy” and will need replacing. The cost
for your area would depend on the size of you need to cover – it was so long ago when we did ours
initially. I’ve checked and our local Wicks is selling boards for £9.34 – £3.89 per M. Hope this helps!